
How-To: Mapping Ontological Classes
Table of Contens
Overview / Introduction
Mapping classes is the foundational process of associating external tool shapes with SBE’s internal class ontologies. This mapping defines how externally authored models correspond to the structured classes within the SBE platform. As the first critical step in enabling model transformations, it ensures that imported data aligns with the semantic structure of the system. Whether initializing a new data integration or updating an existing model’s ontology alignment, class mapping is essential for unlocking further transformations and semantic processing within SBE.
Steps to Class Mapping
High Level Workflow
Identify expected targeted engineering tools for interoperability
This can influence desired artifact + shape capture, as well as properties, datatypes, and relationships
Considerations resulting from tool selection:
Classes:
Class selection should target a decided upon common name for the artifacts expecting to interoperate using ontological best practices
Properties:
In some cases a certain datatype is required by a tool (eg STRING vs PAIR, STRING vs HTML) in order to appropriately persist the property in full detail
Relationships:
Some tools (such as Cameo, Windchill, TeamCenter) utilize “3-tier” relationship representation and require non-isomorphic mapping while some tools use a “2-tier” relationship representation and utilize isomorphic mapping strategy. It is important to identify these in order to complete full interoperability
Identify mapping strategy
Unknown Shapes (most common): for use when you do not know what shapes of the distinct artifact types that are being published out of your tool of interest.
Continue to mapping step 3
Known Shapes (advanced): used when you already know the shapes for the artifacts of interest or a channel + publish have already been completed
Steps 3-5 are optional and still considered best practice if unexpected transformations result
Open a project of interest that contains all of the artifact types you wish to map to digital thread for the data source you wish to have mapped (see adapter use cases for examples)
Attach project to the SBE Vision Digital Thread using appropriate channel properties.
Perform a publish to the SBE Vision Digital Thread
Capture the publish payload shapes & types of interest from “RECEIVED_EXTERNAL_ITEMS”
Identify classes within desired ontology
Apply shape + type to mapping by data source
Replay or Publish once more from the channel of interest and confirm the transformed class for all targeted object typesr
Detailed Mapping Steps
Without Melrose Mapping UI
Open a project of interest that contains all of the object types you wish to map to digital thread for the data source you wish to have mapped (see adapter use cases for examples)
Attach project and perform a publish to the SBE Vision Digital Thread
Capture the publish payload shapes & types of interest from “RECEIVED_EXTERNAL_ITEMS”
SBE Vision offers several methods for capturing the payload shapes & types
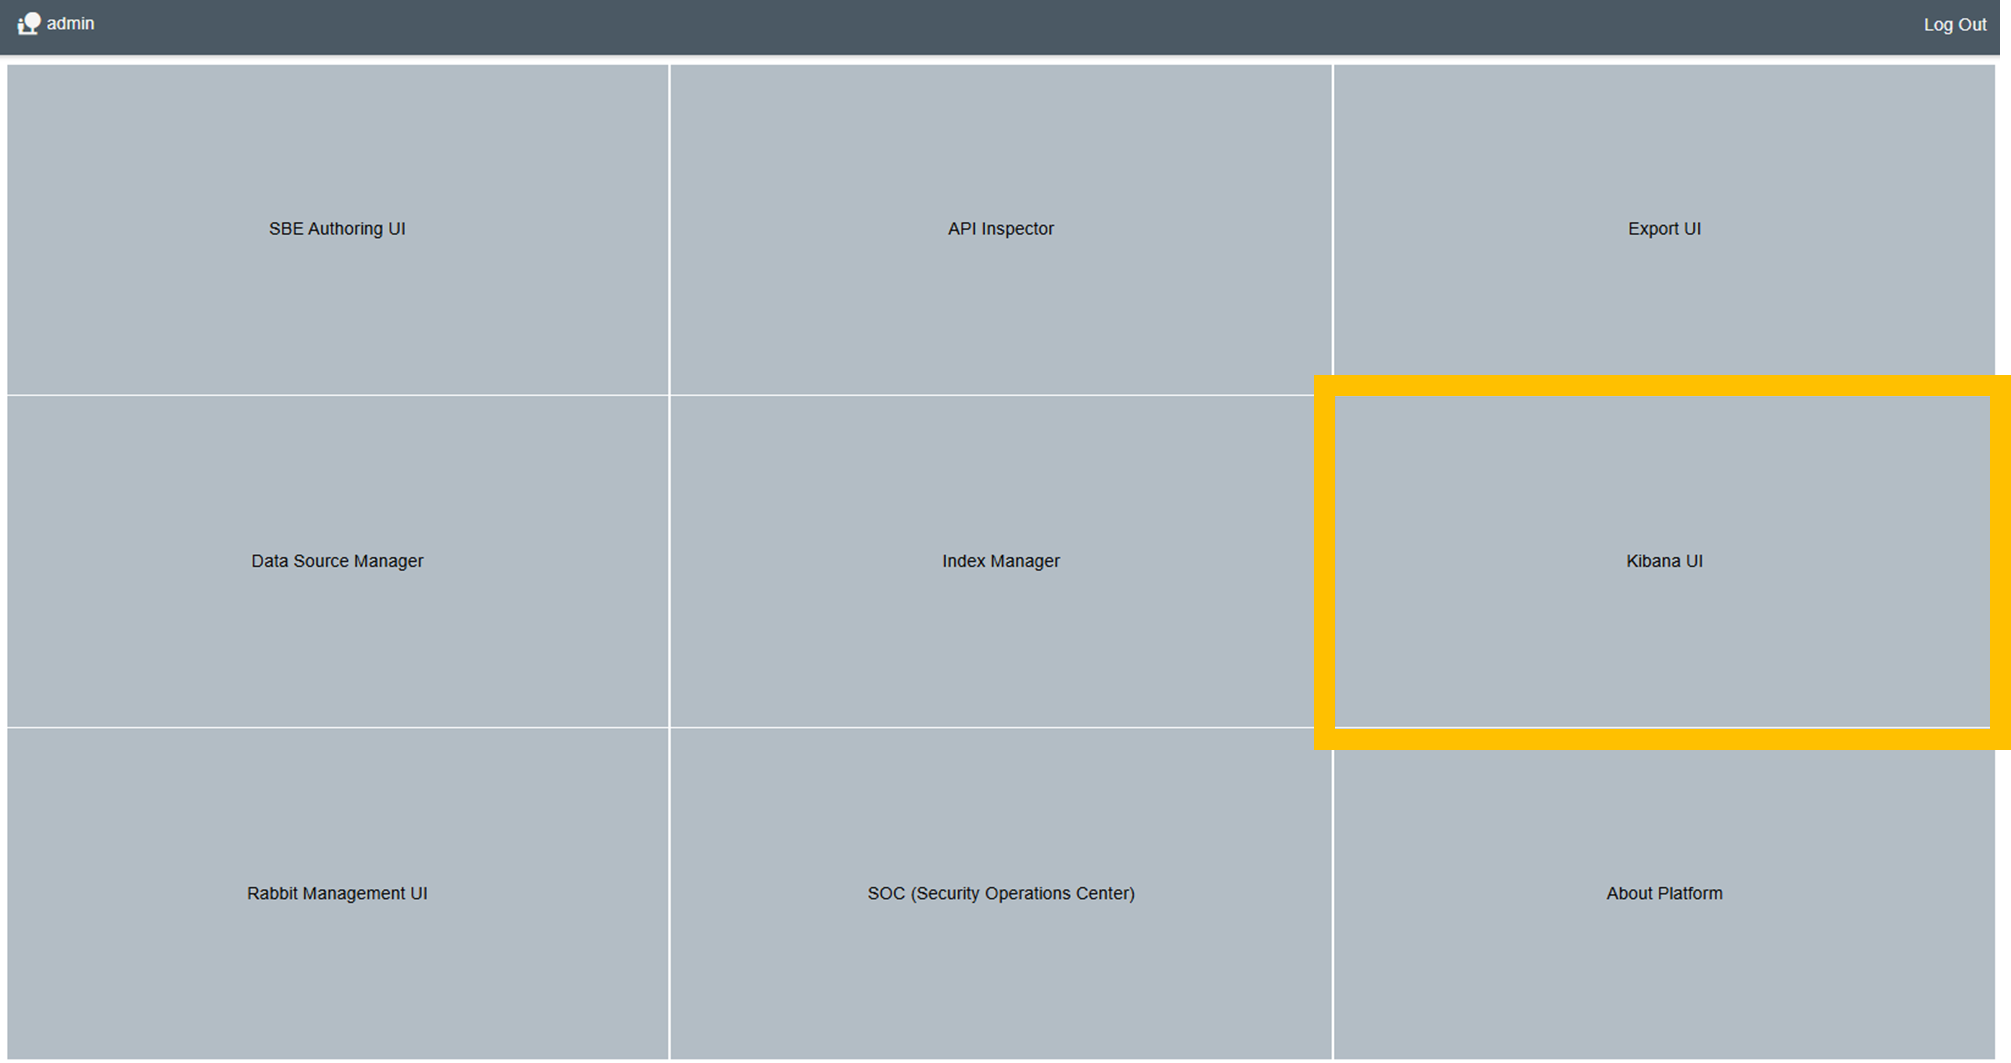
Capturing the Payload Strategy 1: Kibana: this is an application that uses Elasticsearch to index and organize logs from the transformation.
Currently accessible in 7.x & 8.x platforms with the URL pattern: https://<namespace>.<hostname>.com/logs/ (eg https://demo.sbevision.com/logs/) or from the Admin screen link for Kibana UI
Use the “Discover” screen, navigate to the objects Display Name of interest
Extract shapeId & shapeType of interest for each artifact type
Capturing the Payload Strategy 2: Tracking center transformation logs
Download Logs (Detailed) from the channel used in step 1:
7.x Woburn: Use the Tracking center to Download Logs (Detailed)
8.x Melrose: Use Operations tab in “Connection Manager to Download Logs (Detailed)
Optional: Format as JSON viewer for better visibility
Navigate to “RECEIVED_EXTERNAL_ITEM” section of the payload and extract the order, shapeId & shapeType values for all available shapes
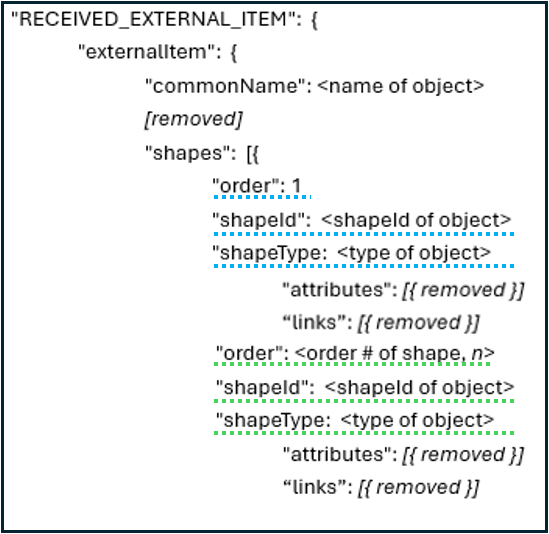
Example “RECEIVED_EXTERNAL_ITEMS shape payload
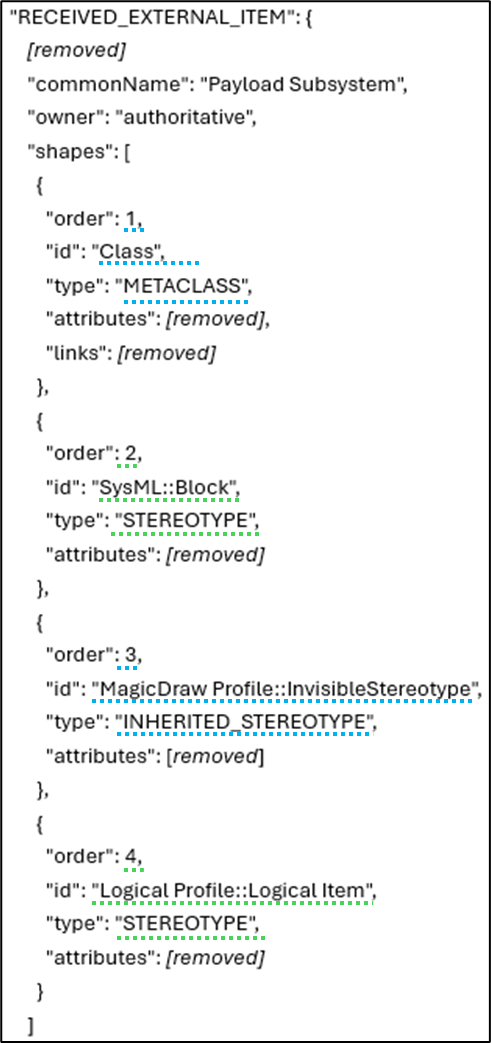
Example order, shape, and type capture
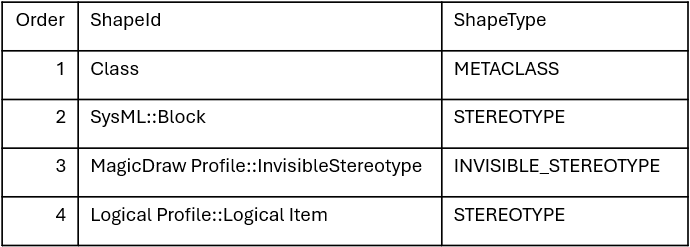
Resulting shape for “Payload Subsystem” includes 4 shapes, see below
Identify classes within desired ontology and left click to bring up class details flyout
This requires identifying the ontology and branch version of the ontology of interest in the Ontology Manager application

Ontology Manager Icon
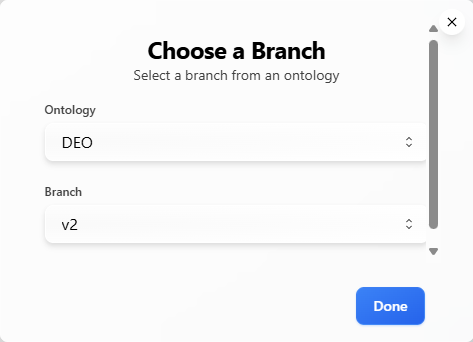
Select Branch for an existing ontology

Select the Ontology + Branch version of interest
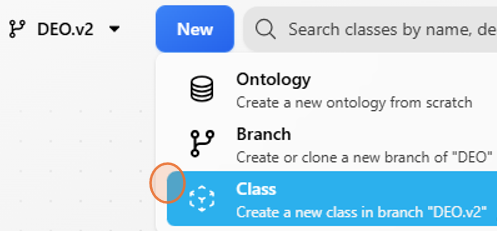
Identify the class you wish to map, or create a new class
For existing class, search or explore with the mouse and left mouse click to bring up the mapping class details page
New classes can be made by clicking New and navigating to Class
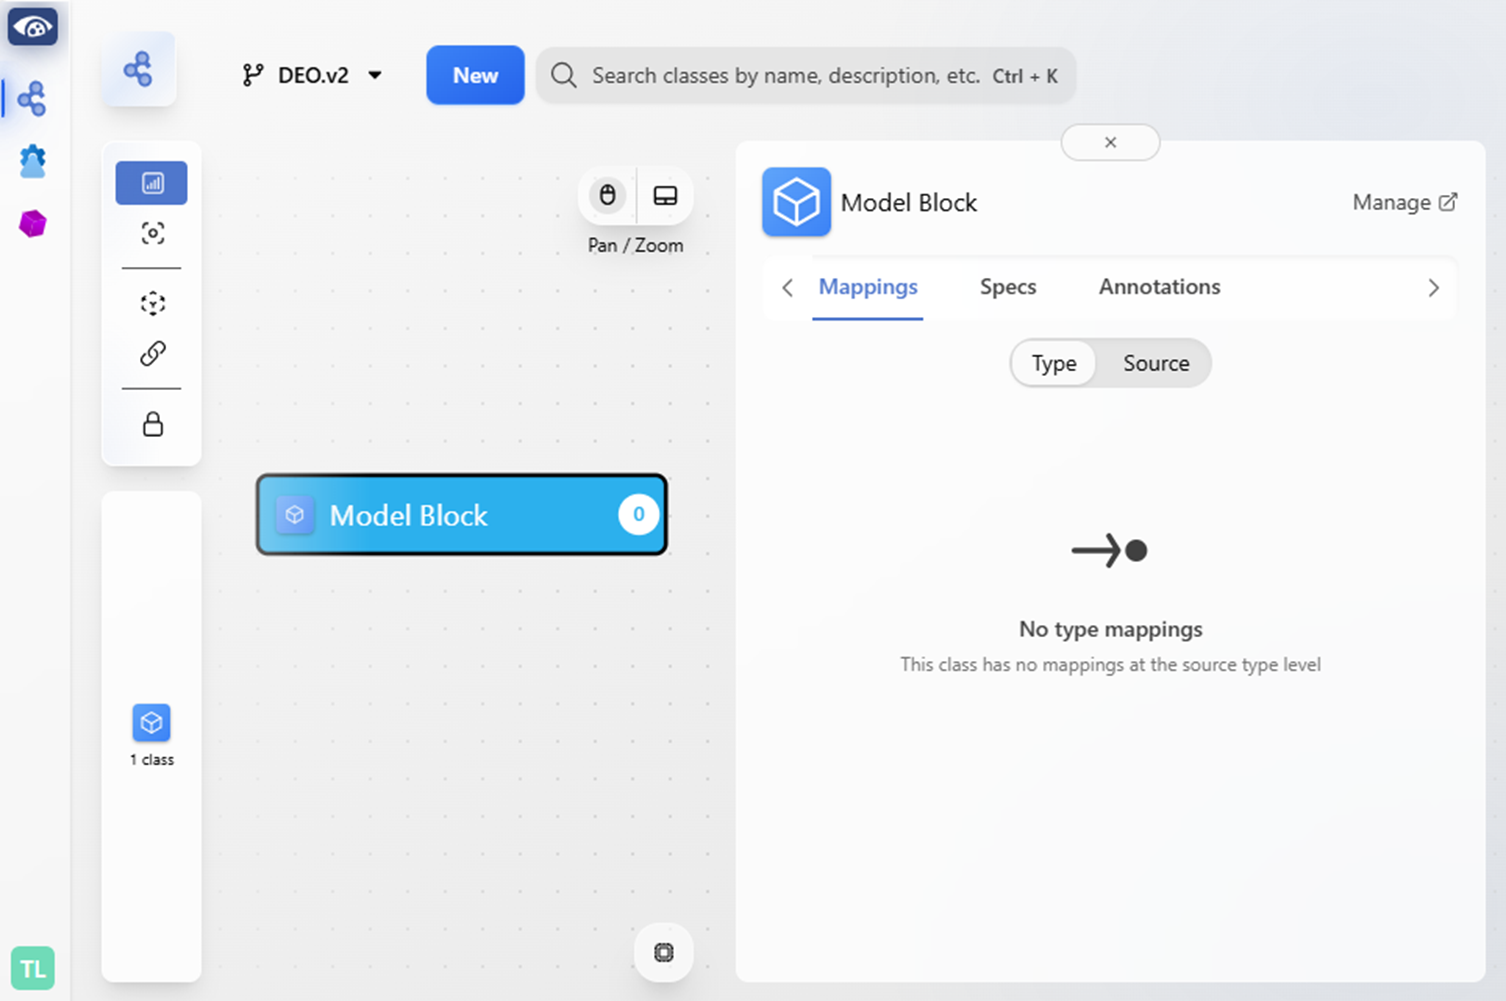
Apply shape + type to mapping by data source
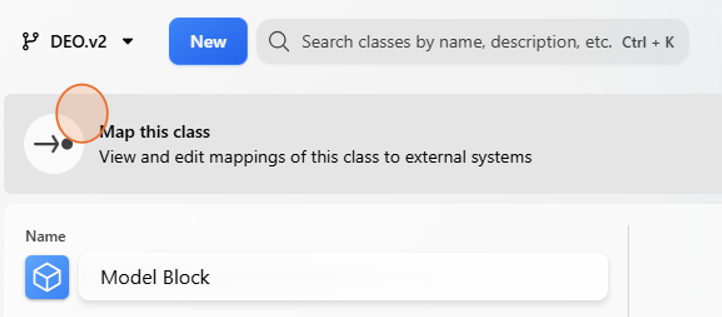
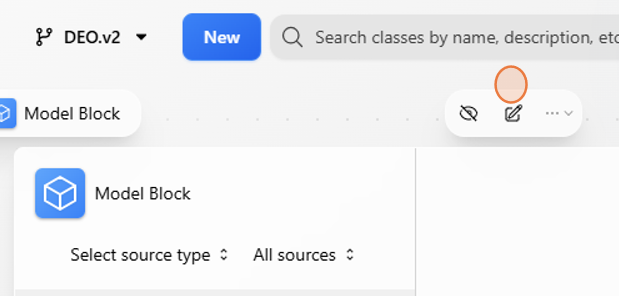
From the class detail page, use the “Manage” button to view details for shape mappings

Select “Map this class” to apply shape mappings
note: the first data source that gets mapped will be prompted to “Initialize” - click this to continue

Click the “Create” icon
Populate the fields according to the desired data source and captured shape + type and click Create
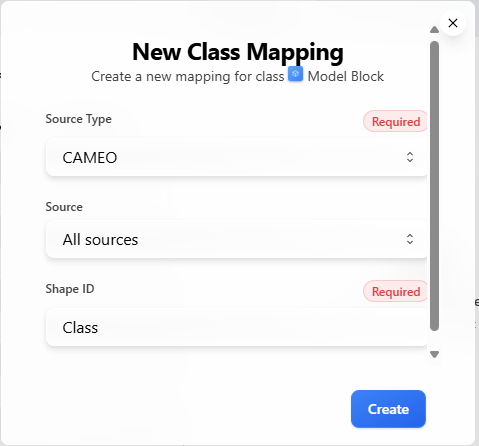
Note: Only 1 shape can be mapped at a time, any class that requires multiple shapes will repeat this step until all desired shapes have mapping
To continue mapping additional shapes, select the data source of interest and once again select the “Create” icon

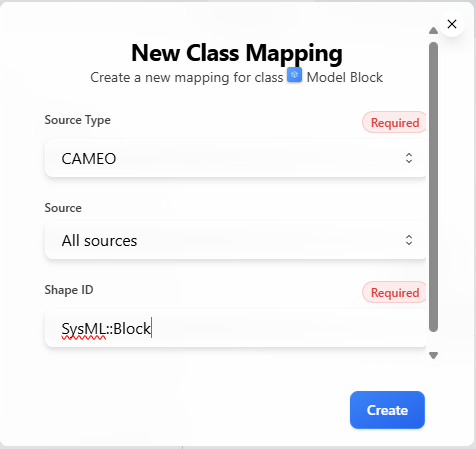
Mapping shape 2
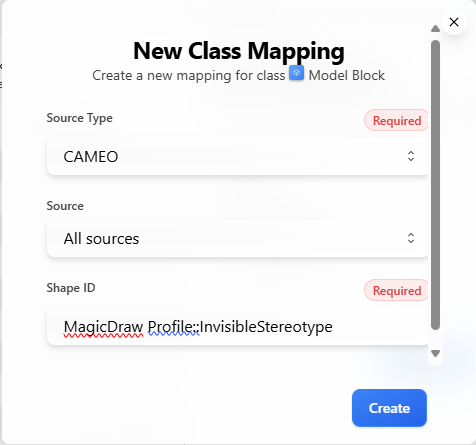
Mapping shape 3
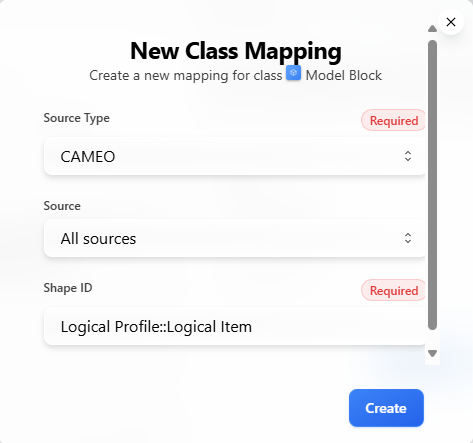
Mapping shape 4
Final shape mapping for “Model Block”
Replay or Publish once more from the same channel and confirm the transformed class for all targeted object types


Mapping with Melrose Mapping UI (8.x Melrose Only)
Navigate to Operations tab from Connection Manager for the channel used in Step 1
Find the publish attempt and click “Start Mapping:
Find the name of the representative object of interest to limit the shapes
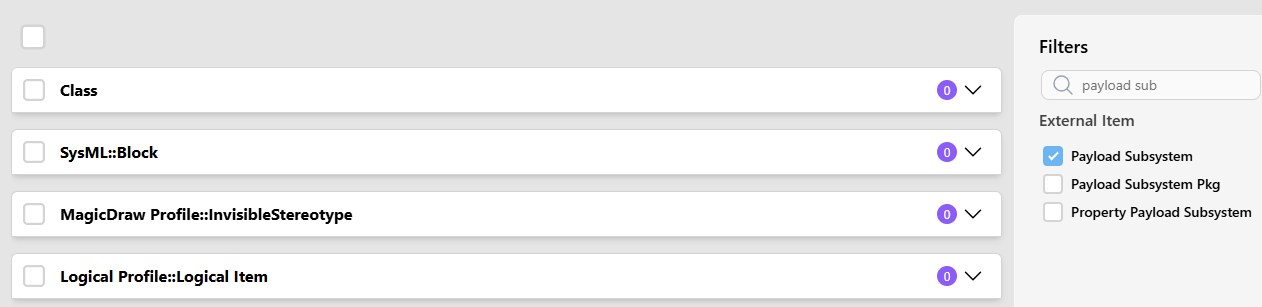
The bolded entries are each shape associated with the selected External Item
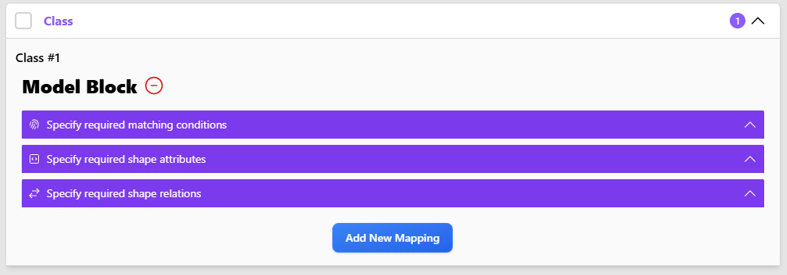
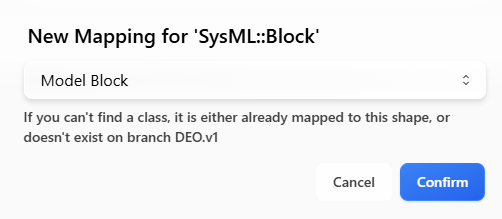
Expand the first shape and select “Add New Mapping”:

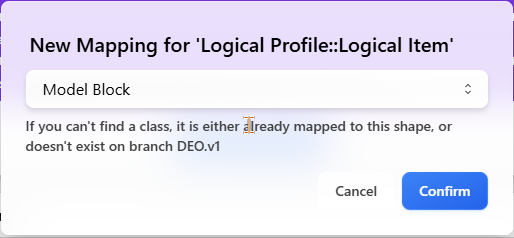
Find the ontological class which you want to represent your model as on the digital thread and click confirm:
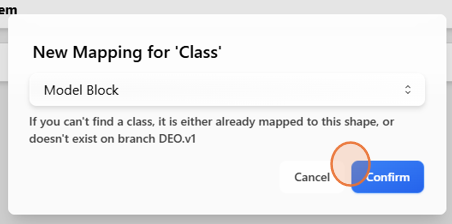
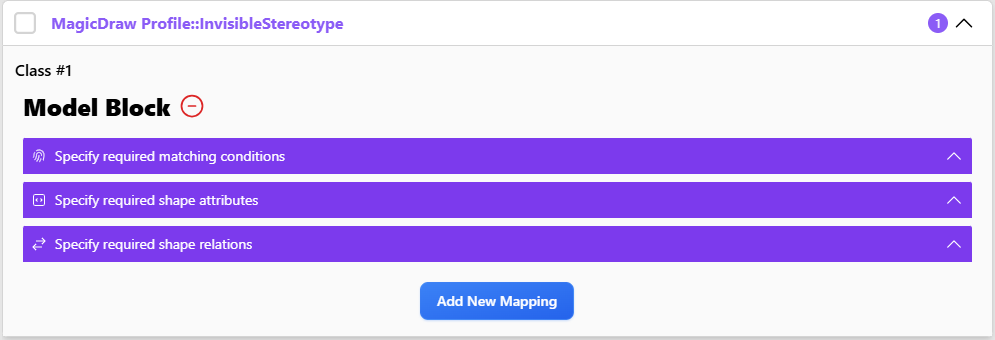
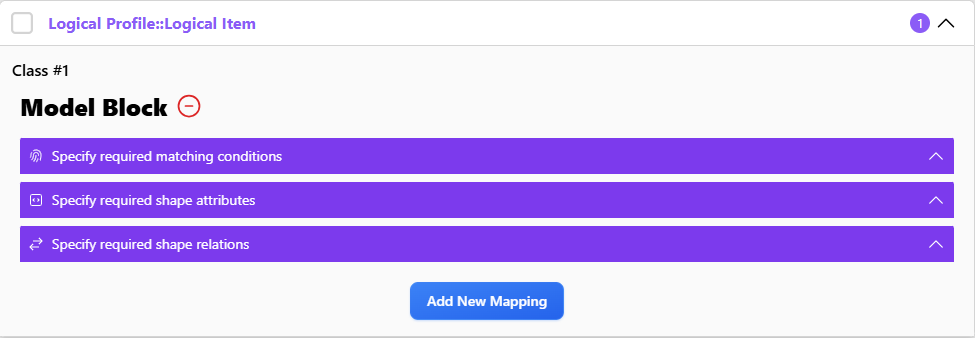
This indicates the shape “Class” has now been mapped to “Model Block” and is ready for additional mapping conditions, mapping attributes, or mapping relationships
Continue this process for every shape associated with your object of interest
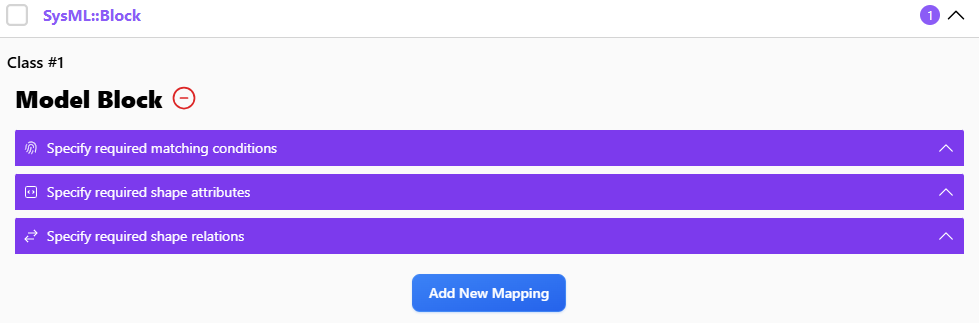
Adding new mapping to “Model Block” for shape 2, “SysML::Block”
Confirming the new available options for the “SysML::Block” shape
Adding new mapping to “Model Block” for shape 3, “MagicDraw Profile::InvisibleStereotype”:
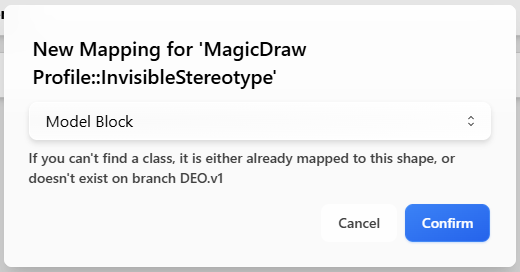
Confirming the new available options for the “MagidcDraw Profile::InvisibleStereotype” shape
Adding new mapping to “Model Block” for shape 4, “Logical Profile::Logical Item”:
Confirming the new available options for the “Logical Profile::Logical Item
Important: these mappings do not apply until final submission. Click Submit to save these mappings

Note: The submit widget includes a summary of mapped (purple) and unmapped (red) shapes, attributes, and relations for the complete publish payload

Mapping classes typically begins with preparing a project that includes all relevant data types, relationships, properties, and models intended for transformation. Although not every element needs to be mapped at once, having a complete dataset before the initial publish simplifies the mapping process.
Users start by attaching to the digital thread via channel properties and executing a publish. While some default mappings may allow for partial success, deeper customization is often necessary. After publishing, users inspect transformation results through tools like Kibana or the Transformer Logs in the Tracking Center (Wooburn or Melrose), or use the “Start Mapping” feature directly within the Tracking Center in Melrose.
The published output is formatted as a JSON document, and class mapping focuses specifically on the Received External Item field, particularly the embedded External Name entries. Each model shape includes an order, shape ID, shape type, attributes, and relationships. Users identify which shapes to map based on their relevance to the intended transformation.
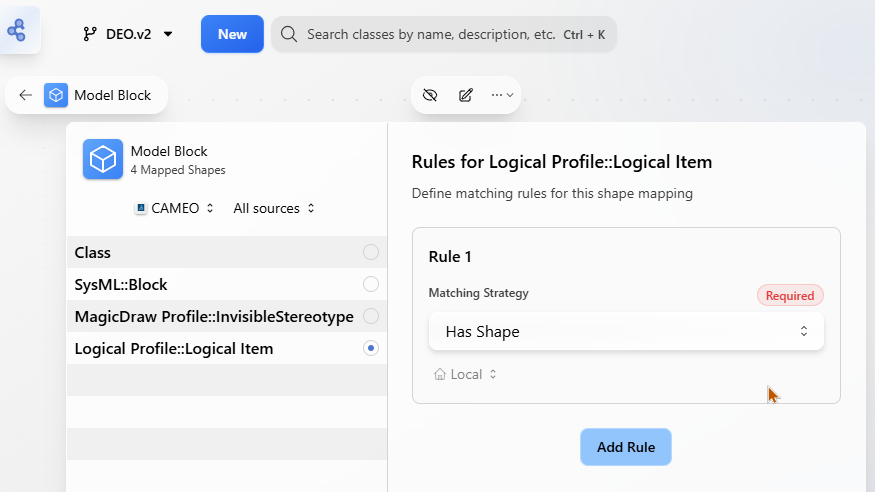
Mapping is done via the class’s Mapping tab in the ontology viewer or authoring UI. Each mapping is tied to a specific data source, reflecting that different tools may require different mapping semantics. The simplest form of mapping uses the HasShape strategy, which relies on specifying the shape ID and shape type.
After defining mappings, users re-publish the channel. Successful transformations appear in the Transformed External Items JSON field and are also visible in tools like Kibana. A Success flag helps confirm the operation’s result. Validation is completed by ensuring that models were transformed into the correct classes — verifiable through the Model Viewer or by reviewing the transformation logs.
Common Pitfalls, Misunderstandings, and Troubleshooting
Several common issues can affect successful class mapping and model transformation:
Misuse of SimplifiedOrders
The SimplifiedOrders option in shape mappings allows users to specify only the first and last shape orders in a model’s payload. The SBE Vision platform will assume all intermediate shapes should be included. However, if the order range is incorrectly defined, it can lead to incomplete or invalid transformations, as the platform cannot reconcile the full shape set.
Incorrect Use of Matching Strategies
Strategies such as CheckAttributeValue, IsAttributePresent, and IsAttributeEmpty depend on specific properties being mapped on the class. If the referenced property isn’t defined — or if it's mapped under a different data source than the one used for the mapping — the transformation may fail or resolve to an unintended class. It's essential to ensure all referenced properties exist and are mapped for the same data source used in the strategy.
Overlooking Inheritance in Mappings
Class inheritance can allow shape mappings and properties to propagate from parent to child classes. However, the specification source can override or disable inheritance behavior. Developers must verify which mappings are inherited and which are explicitly defined or ignored, as this can significantly alter the final transformation results.
Further Reading
For deeper understanding and practical implementation of class mapping in SBE Vision, refer to the following resources:
How-To Guides
Publishing to the Digital Thread
Using the Tracking Center
Viewing Transformation Output in Kibana
Reference Documentation
Matching Strategies Glossary
Non-Isomorphic Mapping Overview
Conceptual Explanations
Understanding Ontologies in SBE
Mapping Lifecycle and Transformation Pipeline